
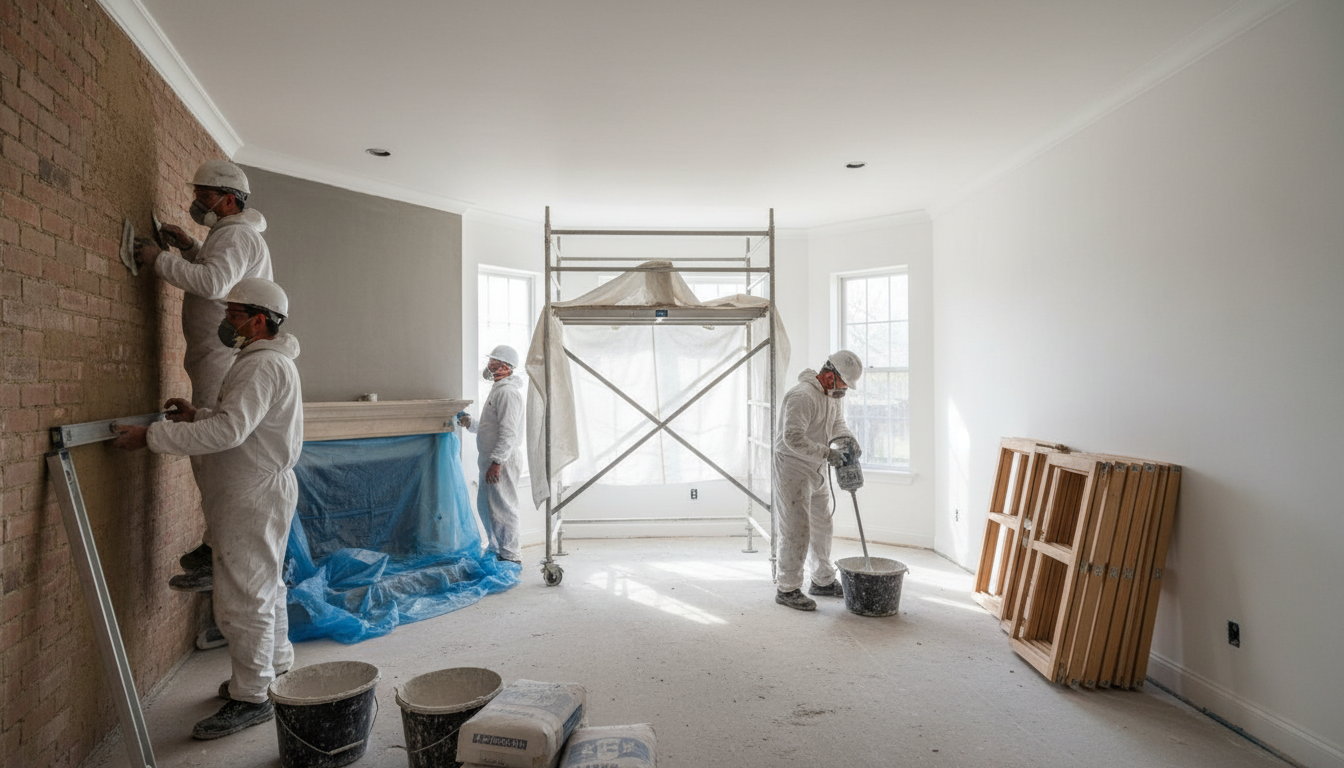
To effectively begin preparing a room for a plasterer Edinburgh homeowners should clear out all furniture, remove wallpaper, and strip window treatments to provide a clean workspace. Additionally, you must protect your flooring with waterproof protectors and ensure the area is well lit so the professional can achieve a smooth, high quality finish.
Renovating an Edinburgh property often brings a unique set of challenges; from navigating tight tenement stairwells to managing the inevitable dust of a home improvement project. Many homeowners feel overwhelmed by the perceived chaos of a plastering job, worrying that their furniture or flooring might suffer during the process. However, the difference between a seamless professional finish and a stressful renovation often lies in the initial groundwork. At PlasterTec Edinburgh, we know that a well prepared room ensures a higher quality result and a more efficient workflow for our team. In this guide, we will walk you through the essential steps to ready your space, covering everything from logistics and wall preparation to floor protection and post plastering care. By following these practical steps, you can ensure your project runs smoothly while protecting the integrity of your home.
Why Preparation Matters for Your Edinburgh Property
Achieving a durable, high-quality finish starts long before the first bag of Multi-Finish is opened. While plastering is inherently a wet and messy trade, the final result depends heavily on the environment and surface provided. In our city, this is particularly significant. When preparing a room for a plasterer Edinburgh properties often present unique challenges, such as the grand, tall ceilings found in Victorian tenements or New Town townhouses. The sheer scale of these walls means that even minor prep oversights can lead to delays or imperfections in the final finish.
It is helpful to distinguish between your responsibilities and those of the professional. Your role as the homeowner is to manage the environment; this includes clearing furniture and ensuring the room is accessible. Our role as a local Edinburgh plasterer is to handle the technical substrate preparation. This involves applying bonding agents like PVA or blue grit to control suction, installing beads for perfectly straight corners, and applying scrim tape to joints. Proper preparation ensures that the plastering services in Edinburgh we provide result in surfaces that are properly bonded and remain crack-free for years to come.
Edinburgh Logistics: Parking, Access, and Water
Logistics in Edinburgh require foresight, especially when considering the physical requirements of a plastering project. Unlike newer developments with ample driveways, many local projects take place in high-density areas. Securing a parking space or a visitor permit close to the entrance is vital. In neighborhoods like Stockbridge, Leith, or the West End, a van parked several blocks away significantly delays the transport of heavy bags of Multi-Finish and mixing equipment. If your property falls within a restricted zone, please ensure permits are arranged in advance to keep the project on schedule.
Access to a reliable water source is the next priority. Plastering is a wet trade; we require frequent access to a sink, bath, or outdoor tap to mix materials and clean tools throughout the day. Similarly, a standard 240v power outlet is necessary for mixing drills and site lighting.
When preparing a room for a plasterer Edinburgh tenement dwellers should also consider their neighbors. The sound of a mixing drill often echoes through communal stairwells, and the movement of materials can lead to increased foot traffic in shared hallways. A quick word to those nearby or a note in the common stairwell helps manage expectations regarding noise. Providing clear, unobstructed access from the street to the workspace allows your local Edinburgh plasterer to focus entirely on the quality of the finish.
Clearing the Space: What Stays and What Goes
When preparing a room for a plasterer Edinburgh homeowners should understand that a clear floor is as vital as a clean wall. A halfway clearing approach, such as simply pushing a sofa a few inches away from the skirting board, is rarely sufficient for professional work. To deliver high-quality plastering services in Edinburgh, we require at least 1.5 meters of unobstructed space around the entire perimeter of every wall. This clearance is necessary for the physical mechanics of the trade; a plasterer needs room to maneuver their hawk and trowel in wide, fluid motions without bumping into obstacles or compromising their stance.
Begin by removing all small furniture, electronics, and delicate items from the room. Plaster dust is incredibly fine and can easily settle inside computer fans or television vents, so these items should be moved to a different part of the house entirely. All wall decor, including mirrors, pictures, and clocks, must be taken down to leave the substrate completely bare.
Do not overlook fixtures that are physically attached to the walls. You should remove:
Curtain poles and their mounting brackets
Roller, vertical, or Venetian blinds
Floating shelves and their internal supports
Protruding nails, screws, or old rawl plugs
If you have large, heavy items that cannot be moved out of the room, such as a substantial wardrobe or a heavy dining table, group them together in the exact center of the space. Ensure they are tightly packed and covered with high-quality protection. By creating this central island, you preserve the 1.5 meter work zone required for a professional finish while keeping your larger belongings safe from accidental splashes.
Wall Preparation: Dealing with Wallpaper and Adhesive
Once the floor is clear, the focus shifts to the substrate itself. A frequent question when preparing a room for a plasterer Edinburgh homeowners ask is: "How clean do the walls really need to be?" The short answer is: completely bare. All wallpaper must be stripped, including the stubborn backing paper and every trace of old adhesive. Plaster is a heavy material that requires a solid mechanical or chemical bond to the wall; it will not adhere to wallpaper paste, which can rehydrate and cause the new skim coat to peel or bubble.
If you are stripping the walls yourself, aim for a clean surface without compromising the integrity of the wall. While minor nicks and small holes are easily filled during the plastering process, avoid using heavy scrapers that gouge deep into the underlying plaster or lath and plaster. Deep gouges can create structural weaknesses or require extra coats of bonding material, adding time to the project.
Many clients also ask if they can skim coat an already painted wall. It is possible, provided the surface is prepared correctly. Most painted surfaces require a bonding agent such as PVA or a specialized product like blue grit, which contains fine aggregates to provide a key for the plaster to grip. This is especially critical on silk or gloss paints, which are too non-porous for a direct application of plastering services in Edinburgh. Ensuring these surfaces are prepped with the right grit or adhesive ensures the local Edinburgh plasterer you hire can deliver a finish that stays flat and secure for the long term.
The Skirting Board and Socket Dilemma
Edinburgh period homes often feature grand, original woodwork that presents a specific challenge when preparing a room for a plasterer Edinburgh. The decision to remove or keep skirting boards depends on your desired finish and the condition of the wood. If you choose to leave them in place, your local Edinburgh plasterer will finish the new skim coat exactly to the top edge of the board. This is often the safest route for fragile, original Victorian or Georgian timber. However, if you are looking for a perfectly seamless result or plan to replace the wood, removing the boards allows the plaster to extend further down the wall. Be aware that original Edinburgh skirtings are frequently brittle; removing them often leads to splintering or breakage.
Electrical faceplates also require attention to ensure a professional edge. For the best result from your plastering services in Edinburgh, unscrew the socket and switch plates so they hang slightly away from the wall. This allows the plasterer to work behind the plate, ensuring no gaps are visible once the covers are screwed back on. Most importantly, you must safely isolate the power at the consumer unit before touching any electrical fittings. Leave the wires and 'guts' attached, simply pulling the plate forward by a centimeter or two to create the necessary clearance. This small step prevents the unsightly ridge of plaster that occurs when a professional has to work around a fixed plate.
Protecting Your Floors and Carpets
Protecting the flooring is a critical phase when preparing a room for a plasterer Edinburgh homeowners often overlook the sheer weight and moisture of wet plaster. Standard cotton dust sheets are insufficient for plastering services in Edinburgh. Wet plaster can seep through the weave; this often leaves permanent stains on carpets or abrasive grit on delicate floorboards. Instead, utilize heavy duty Correx sheets for hard floors or a high tack sticky carpet protector for textile surfaces. Correx provides a rigid barrier that resists impact from falling tools or heavy buckets, while sticky film prevents the protection from sliding underfoot during the fast paced trowelling process.
Equally important is the path of travel. A local Edinburgh plasterer will move between their mixing station and the workspace dozens of times. This is particularly vital in communal tenement stairs where tracking white dust onto shared carpets can cause issues with neighbors. Line the hallway and entrance thoroughly to maintain the cleanliness of common areas. Taking the time to secure these materials ensures that the only thing left behind is a smooth wall, not a ruined carpet.
What to Expect on Plastering Day
On the morning the work begins, expect the process to follow a disciplined timeline. For most standard residential rooms, professional plastering services in Edinburgh typically span one to two days. The day starts with the final site preparation; this includes fixing metal angle beads to corners and applying a bonding agent to the substrate. You will notice a significant increase in noise as high-powered mixing drills combine water and plaster to the correct consistency. This stage also generates a fine dust that, despite all precautions, is an inherent part of the trade.
The application itself involves three distinct phases: the first coat for leveling, the second coat for depth, and the intensive trowelling up phase. During this final stage, the plasterer uses water and a stainless steel trowel to polish the surface as it begins to set. As the plaster releases moisture, the room will become noticeably humid. While a local Edinburgh plasterer like PlasterTec Edinburgh prioritizes a tidy workspace by bagging waste and wiping down surfaces, some secondary cleanup is unavoidable. When preparing a room for a plasterer Edinburgh clients should anticipate a final wipe-down of floors and surfaces once the tools are packed away, as plaster residue can settle in even the most well-protected spaces.
Managing Post Plastering Drying Times
Once the final trowel stroke is complete, the focus shifts to the curing process. In the damp Scottish climate, managing moisture is essential. Plaster dries through evaporation, meaning the room needs steady airflow rather than intense heat. When preparing a room for a plasterer Edinburgh residents must also plan for this post-work environment. A common mistake is turning the central heating to its maximum setting immediately. This rapid dehydration forces the material to shrink too quickly, often resulting in hairline cracks or crazing. Instead, maintain a moderate, consistent temperature and keep windows slightly ajar to allow humid air to escape.
You will notice the walls transition from a dark, wet brown to a deep pink, eventually settling into a uniform pale color. This typically takes between 7 and 14 days, though thicker areas or external walls in cold stone tenements may take longer. Do not attempt to decorate until the color is perfectly consistent across the entire surface. Once dry, the first layer of paint must be a mist coat, which is a diluted mixture of matte emulsion and water that penetrates the new surface. Following this drying time and mist coats protocol ensures that the plastering services in Edinburgh provided by a local Edinburgh plasterer result in a professional, long-lasting finish ready for your final color.
Proper preparation is the foundation of any successful plastering project. By clearing the room and protecting your floors, you ensure that the work proceeds efficiently and without unnecessary mess. While these steps are manageable for many homeowners, achieving a flawlessly smooth finish often requires a professional touch. If you want expert help with your next home renovation, you can learn more about our team and our commitment to quality. We are here to help you transform your Edinburgh home with ease.